
 Experiments - Beta
CONP Portal | Share
Upload a dataset | Upload a tool/pipeline | Upload an experiment | DATS Editor
Dataset Addition Procedures
Introduction
Thank you for sharing your data with the CONP and the scientific community! Making your data FAIR (Findable, Accessible, Interoperable, and Reusable) is key to making your research findings more impactful and likely to contribute to scientific discovery, as well as scientifically and strategically useful to both you and your peers. Below, we describe four different methods for adding your data to the CONP Portal.
Two files are required for all datasets and any upload method:
-
A
DATS.jsonfile: This file contains the essential metadata that describes your dataset and serve to populate various fields describing your dataset on its Portal page. This is crucial to making your dataset FAIR and, therefore, easier to discover and explore. The full description of theDATS.jsonfile is found here, including which fields are required, but we recommend using our DATS GUI Editor for easy creation of this file. -
A
README.mdfile: The content of this file will be displayed in your dataset’s page on the CONP Portal. Though it can recapitulate some basic information in the DATS file (see above), it should primarily complement that information with a generally accessible description of the dataset and relevant details, such as experimental conditions and motivation. TheREADME.mdis in Markdown format, for which there are many guides but here is one quick cheatsheet. If you do not already have a favourite Markdown editor, you can use a browser-based editor with live preview (e.g., StackEdit).
Optional files in the root directory
- A study, lab, or institutional logo can be added to the root directory of the dataset, in which case it will appear on your dataset’s Portal page along with the information from the
README.mdandDATS.jsonfiles described above.
Upload methods
There are presently 4 ways of sharing a dataset through the CONP Portal:
- I. Upload using Zenodo storage
- II. Upload using OSF storage
- III. Upload to the CONP Community Server
- IV. Upload using DataLad
If you need help at any stage, please open an issue in
the CONP-PCNO/conp-dataset repository and we will do our best to help you.
I. Upload using Zenodo storage
-
Add the required files to the root directory of the dataset and consider the optional logo, as described above.
-
Upload your dataset to Zenodo with the keyword
canadian-open-neuroscience-platform. If your dataset is larger than 50GB, you will need to contact Zenodo support using the request category of "File upload quota increase" before you will be able to upload it. Alternatively, you can consider upload options III and IV below. -
If you set your dataset as restricted, create a Zenodo Personal Access Token (via Applications > Personal access tokens > New Token). Check all scopes when creating the token and send the token via email to CONP Technical Steering Committee member Tristan Glatard (tglatard@encs.concordia.ca).
II. Upload using OSF storage
-
Add the required files to the root directory of the dataset and consider the optional logo, as described above.
-
Upload your dataset to the OSF with the tag
canadian-open-neuroscience-platform. -
CONP supports both
privateandpublicOSF datasets.
- For
Publicdatasets, ensure that the dataset is set toPublicon OSF. - For
Privatedatasets, do the following to ensure that the CONP automatic crawler can recover the OSF dataset and add it to the CONP super dataset:- Ensure that the dataset is set to
Privateon the OSF.
- In theContributorstab for the dataset, create userCONP-BOTand grant itREADpermission.
- Do not add theCONP-BOTuser as a Bibliographic Contributor.
- Ensure that the dataset is set to

III. Upload data to the CONP Community Server
If you require data hosting, you may be eligible for a space allocation on the CONP Community Server. Please use the CONP Portal Contact Form so we can evaluate your needs and help you upload your data.
IV. Upload using DataLad
This upload procedure requires some technical knowledge (GitHub, git, git-annex) and an account on GitHub, but offers some useful options and flexibility in data-hosting location.
CONP datasets are managed using DataLad, a tool built on git and git-annex for managing digital objects such as datasets. Further information and tutorials are available here.
Important notes:
-
The CONP datasets require a recent version of git-annex (the 10.x series, shipped from late 2024, is recommended) and a recent stable release of DataLad
-
We also recommend setting your
gitconfiguration to store your username and email:git config --global user.name "your_user_name" git config --global user.email "your.name@your.institution.ca" git config credential.helper cache (keeps login information in memory for 5 mins)
Summary of the DataLad upload process:
- 1) Installing DataLad
- 2) Creating a new DataLad dataset
- 3) Populating the new dataset
- 4) Publishing the new dataset to GitHub
- 5) Testing the new dataset before adding it to the conp-dataset DataLad super dataset
- 6) Obtaining a Digital Object Identifier (DOI) for your dataset
- 7) Adding the new dataset to the list of CONP datasets (a.k.a. https://github.com/CONP-PCNO/conp-dataset)
1) Installing DataLad
-
on Linux: We recommend the Miniconda installation procedure detailed in the Install DataLad on linux-machines with no root access entry on the DataLad Handbook, which installs the most up-to-date versions of DataLad, git-annex, and git.
-
on Mac OS: Please visit the Install DataLad section of the DataLad Handbook and follow the instructions for Mac OS install.
-
on Windows: Please visit the Install DataLad section of the DataLad Handbook and follow the instructions for Windows 10. Also, the best way to achieve 'native' Bash compatibility with a modern Ubuntu-based system may be to install the "Windows Subsystem for Linux" and a bit of Googling will find you many guides on how to do this.
2) Creating a new DataLad dataset
The first step in uploading a dataset to CONP via DataLad requires the creation of a new DataLad dataset that will be tracked on GitHub.
-
Create a local DataLad directory:
datalad create <new_dataset_name> -
Create a sibling for your dataset on GitHub. The command below will generate a sibling in your local space:
cd <new_dataset_name>
datalad create-sibling-github <new_dataset_name>
To inspect existing siblings, run
datalad siblings.NB: Since GitHub changed the name of the default branch from
mastertomain, it is now necessary to explicitly set the default branch of a newly created git-annex repository. This can be done in the GitHub interface under Settings -> Branches for the repository.
3) Populating the new dataset
Choice of how to populate a new dataset will vary based on the special remote providing access to the data. The following procedure covers working with the web special remote.
Dataset requirements:
Add the required files to the root directory of the dataset and consider the optional logo, as described above.
How to track the different files of the dataset:
All files in the dataset must be added to the repository using one of the two commands below. Copying content from another location into your local copy of the repository without using those commands will not work.
-
For data files on FTP or HTTP servers, use the
webremote to populate the data for each individual file:git annex addurl <URL_of_file> --file <linkname>*The
--fileswitch is optional but recommended because, without it, the default name for a link is built from the full URL of the resource and tends to be unwieldy and/or uninformative.*NB: Generating the link requires enough space on your local machine to store the large data file, as
git-annexneeds to download the file to generate checksums. -
For metadata files (e.g.,
README.md,DATS.json, logo files), usegitso that they are not annexed, and therefore are readable by the CONP Portal and users:git add README.md git add DATS.json git add <study_logo>
To save the changes made to the directory with DataLad, run:
datalad save -m "<a constructive message describing the state of the dataset>"
*Message example: initial population of <name_of_new_dataset>
4) Publishing the new dataset to GitHub
Ensure that all changes have been saved in DataLad (datalad save -m "<message>"). Then, from the DataLad directory, publish the DataLad dataset to GitHub:
datalad push --to github
[ NB: In versions of DataLad before 0.13, this functionality used datalad publish. There are some differences between these two commands but they are not relevant to this operation. ]
5) Testing the new dataset before adding it to the CONP-PCNO/conp-dataset DataLad super dataset
Test that the dataset published on the new GitHub repository can be correctly downloaded:
- Check that the default branch on the dataset is set to
main:
- Open the repository on GitHub
- Click on the Settings tab (rightmost in the menu below the repository title)
- Click on Branches in the menu on the left of the page. The Default branch setting is at the top of the page this retrieves.
- If the default branch is set to
git-annex, change it tomain.
-
Do a clean install of the new dataset GitHub repository on a different directory:
datalad install -r http://github.com/<your_user_name>/<new_dataset_name>
cd <new_dataset_name>
*This
-ris a recursive install that will install all submodules of the new dataset (if there are any). -
Test that all dataset files download correctly from the URLs:
datalad get *
6) Obtaining a Digital Object Identifier (DOI) for your dataset
We recommend that datasets uploaded to CONP have a unique and permanent Digital Object Identifier (DOI) to make them citeable and retrievable. To get a DOI for your dataset, follow these steps:
-
Log in to Zenodo, preferably using your GitHub account.
-
Select the new GitHub dataset repository in the list of GitHub repositories in Zenodo.
-
Release the new dataset on GitHub (see instructions here). An archive of the new dataset will automatically be created on Zenodo, along with a DOI.
-
Get the Concept DOI badge from the Zenodo list of GitHub repositories here. Add that DOI to your dataset's
README.mdfile and to the identifier field of yourDATS.jsonfile. This DOI will always link to the latest release of the dataset. -
Note: Whether or not you have a DOI for your dataset, the CONP will create and assign a similar persistent identifier for your dataset using Archival Resource Keys (ARKs).
7) Adding the new dataset to the list of CONP datasets
To add the newly created dataset to the list of CONP datasets present in the DataLad “conp-dataset” super dataset, you will need to submit a pull request to https://github.com/CONP-PCNO/conp-dataset. Circle CI will automatically test the newly added dataset to confirm whether files download correctly, validate the format of the DATS.json file, etc.
Procedure to follow to add the new dataset to https://github.com/CONP-PCNO/conp-dataset:
-
On GitHub, fork a new copy of
https://github.com/CONP-PCNO/conp-datasetinto your userspace. -
Install that copy locally:
datalad install https://github.com/<your_user_name>/conp-dataset.git -
Install the new dataset into the
projectsdirectorycd conp-dataset/projects git submodule add <new_dataset_github_repository>*
<new_dataset_github_repository>will be of the formhttps://github.com/<username>/<new_dataset_name>.git -
Save the changes and push the branch to your fork
datalad save -m '<message>' datalad push --to origin -
Send a pull request (PR) from your fork's
mainbranch to themainbranch ofhttps://github.com/CONP-PCNO/conp-dataset. You should see two file changes in the PR:-
Modification to the
.gitmodulesfile to add the information for the new dataset. The added information should be of the form:``` [submodule "projects/<new_dataset_name>"] path = projects/<new_dataset_name> url = https://github.com/<username>/<new_dataset_name>.git branch = main ```
-
The last line will need to be added manually. This is now required for compatibility with github renaming the default branch.
*note: ensure that there is an empty line at the end of the .gitmodules file otherwise it will not pass the format-checking tests of your PR.
- a link to the latest commit of the <new_dataset_name> GitHub repository
Pipeline Addition Procedure
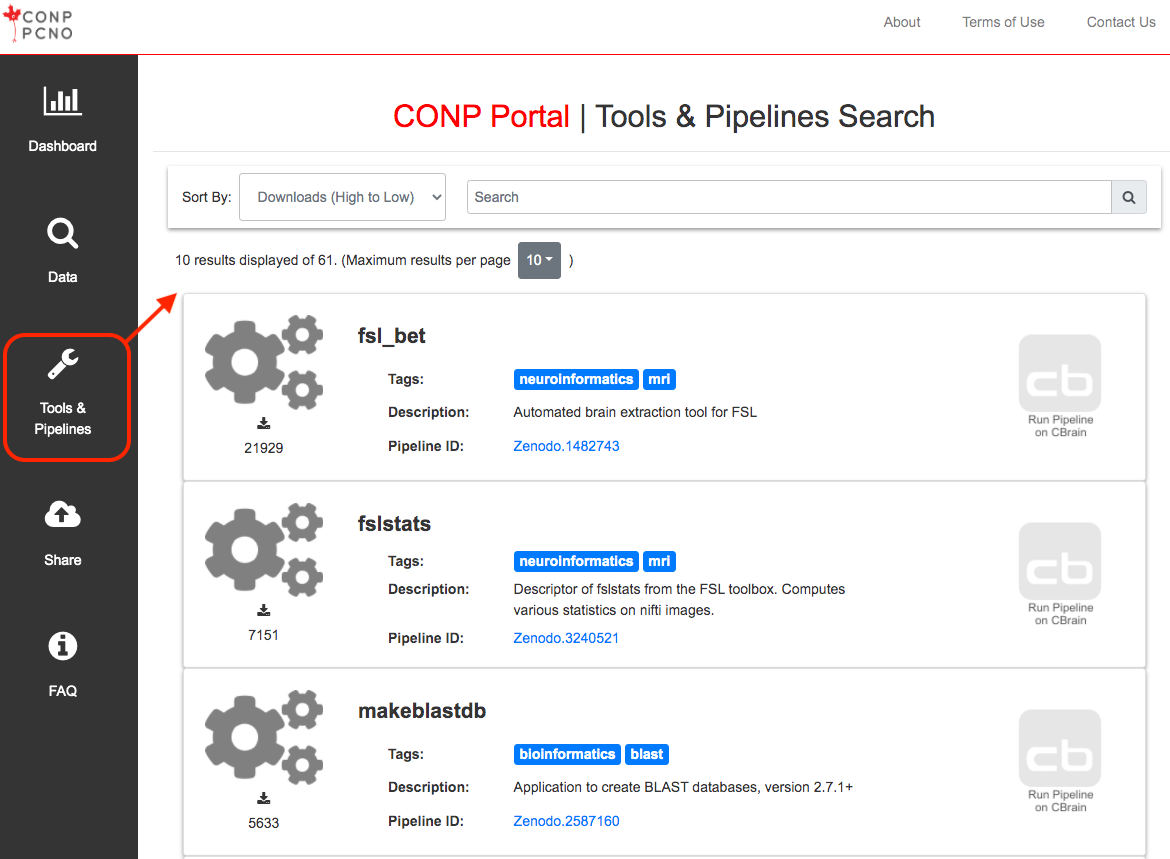
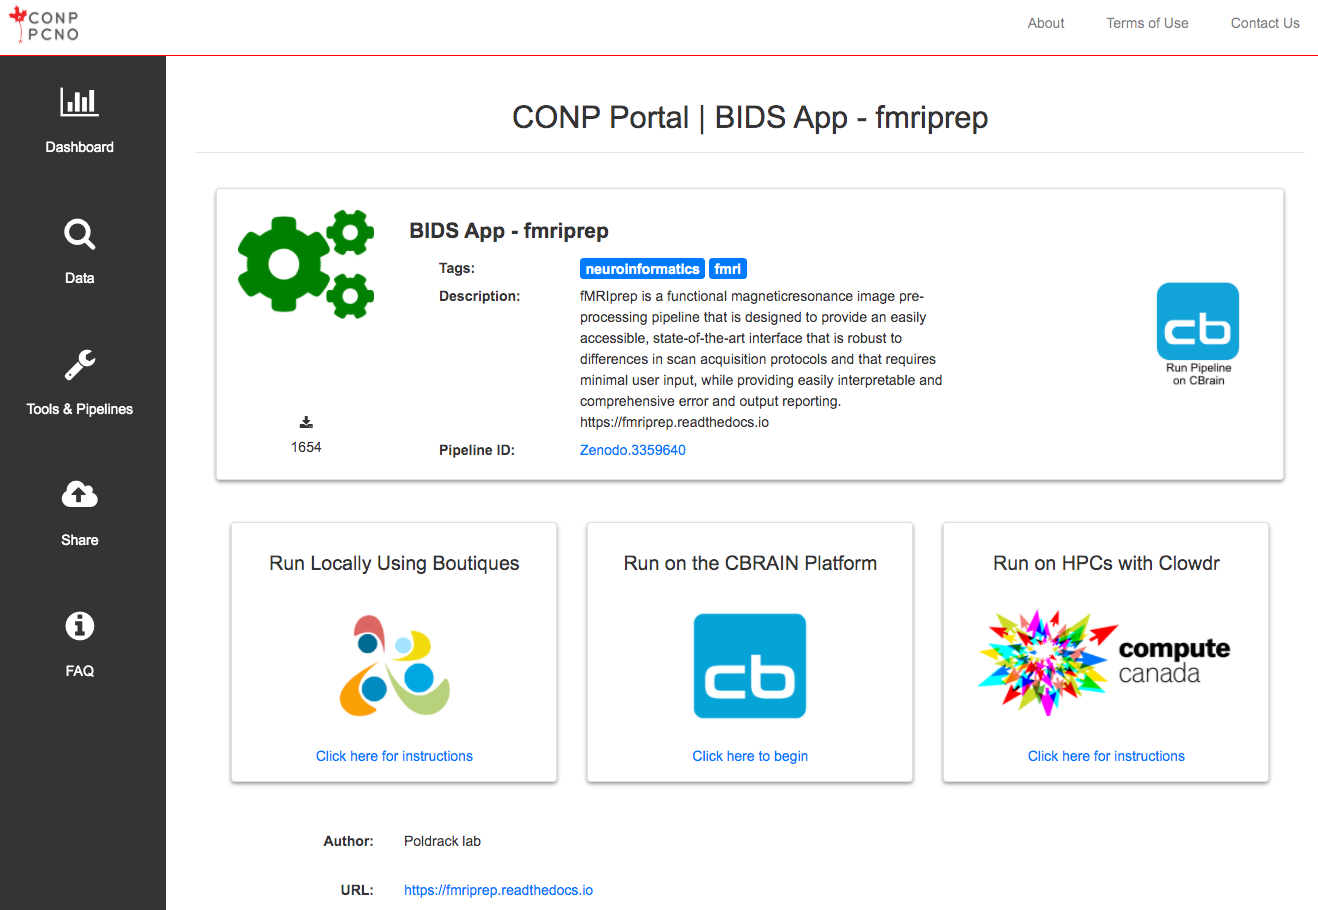
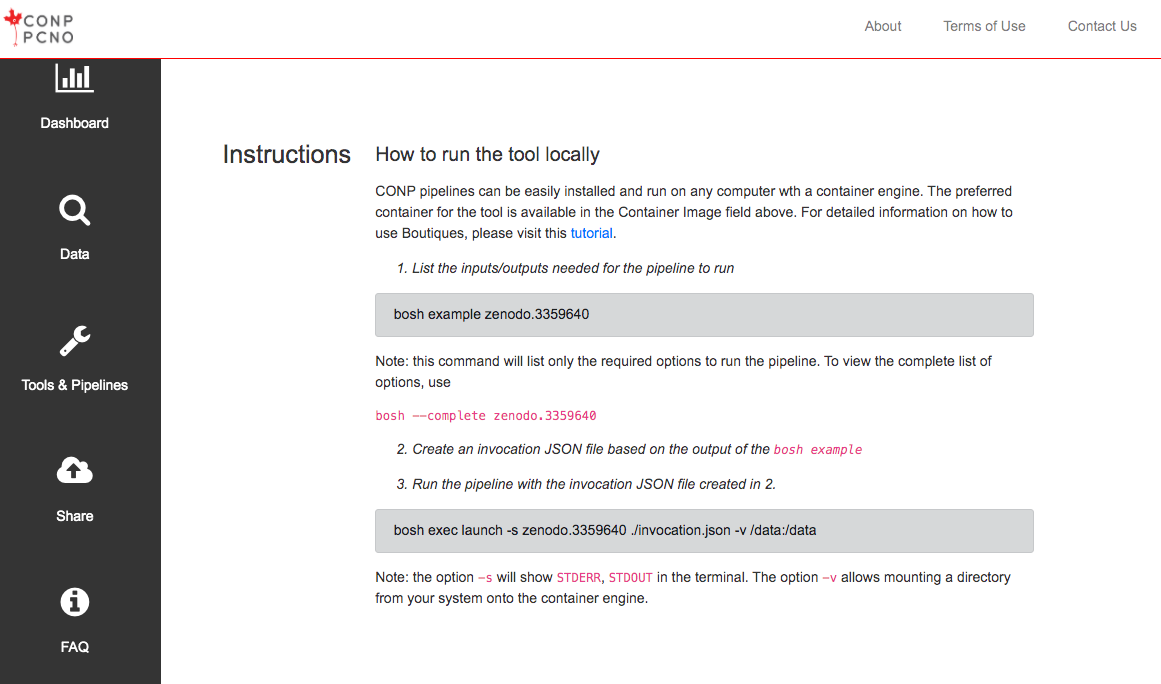
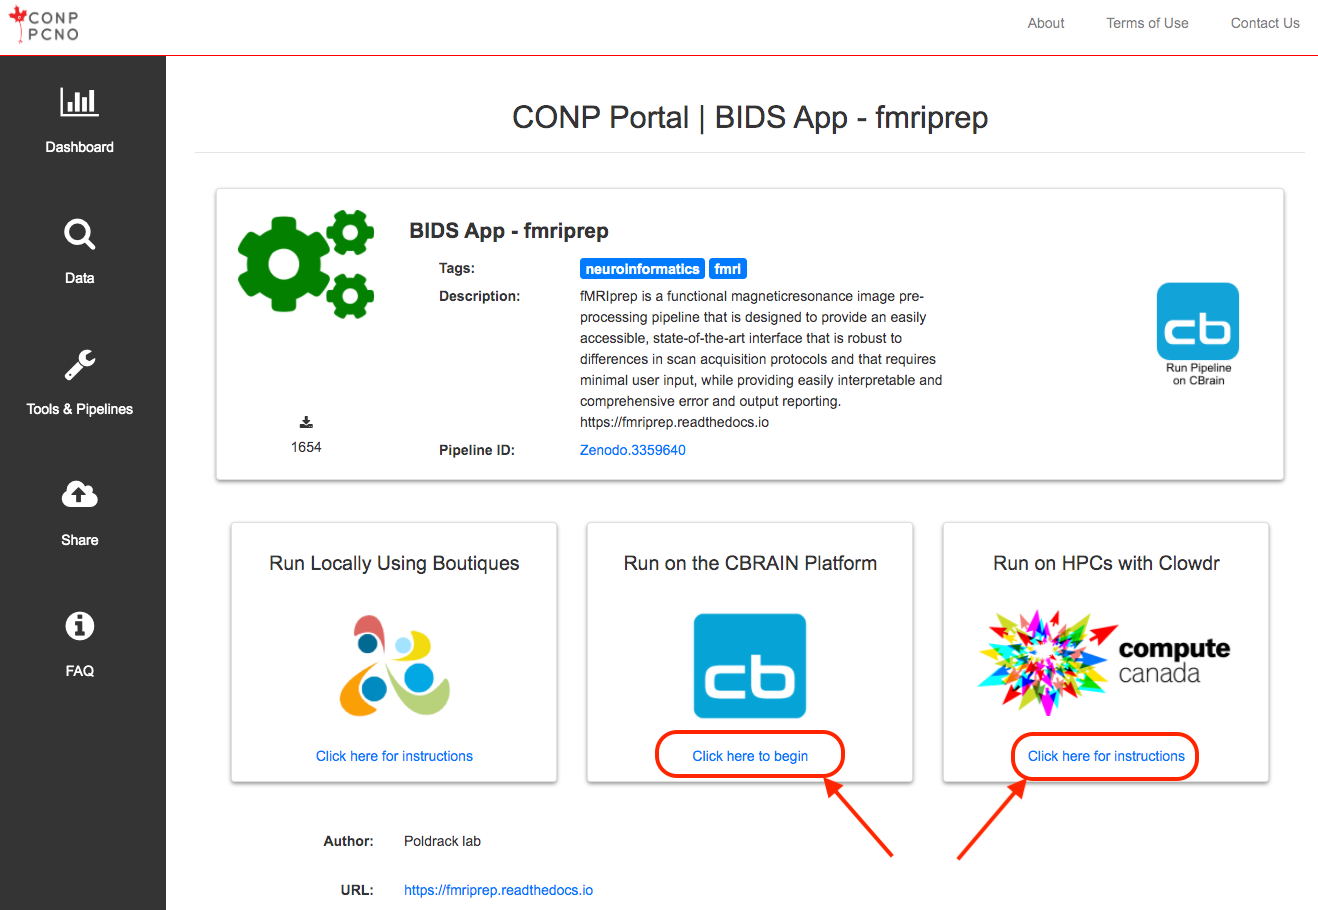
The CONP Portal uses the Boutiques framework to describe, package, validate and deploy its tools and pipelines. For more information on how to publish tools with Boutiques, please visit the 'Publishing your own tool' section of the Boutiques tutorial Python notebook. If you follow these instructions, your tool will subsequently appear in the Tools & Pipelines section fo the CONP Portal.
Experiment Addition Procedure
Introduction
Along with the possibility of sharing datasets and analysis tools, the CONP Portal can share all the elements of an experimental protocol, including scripts for behavioural testing (e.g., a working memory task) and communication with hardware (e.g., task synchronization with an fMRI scanner), stimuli and scripts required to generate them, etc. This feature is now entering a public beta phase and the CONP is ready to welcome submissions.
Required files for all experiments:
-
A DATS.json file: This machine-readable file contains the essential metadata of your experiment and serves to populate various fields on your experiment’s CONP Portal page. It is crucial to making your experiment FAIR and, therefore, easier to discover and explore. The full description of the DATS.json file is found here, including which fields are required.
-
A README.md file: This human-readable file will be displayed in your experiment’s page on the CONP Portal. It will give others important information about the experiment, including its features, development, and administration. The README.md is in Markdown format, for which there are many guides, but here is one quick cheatsheet.
-
An image, gif, or logo file: This file will be displayed in your experiment card on the CONP portal experiment search page. We recommend an animated gif showing one trial of the experiment to give others a sense of what the experiment involves, but an image or logo is also acceptable. The filename is to be added in the DATS.json file.
We strongly recommend you use our browser-based editor to create the first two files. It will walk you through each step and ensure the information is consistent between both files. You can then simply download the files, add them to your experiment directory, and share your experiment using one of the options below.
Upload methods
There are presently two ways of sharing an experiment through the CONP Portal:
-
Upload to OSF storage
-
Upload to the CONP Community Server
If you need help at any stage, please use the CONP Portal Contact Form and we will do our best to assist you.
- Upload using OSF storage (recommended)
-
Add the required files to the root directory of your experiment, as described above.
-
Create an OSF project
- If this is your first time using the OSF, follow these guidelines for creating an account and starting a project.
- Upload your experiment to the OSF with the tag canadian-open-neuroscience-platform
-
Make sure your experiment contains no confidential data files!
-
If your experiment is already hosted online (e.g., on GitHub), you can simply link your OSF project to that application using Storage Add-ons.
-
If your experiment involves multiple phases with separate linked repositories (e.g., immediate and delayed memory hosted on GitHub), you can use OSF components to include them under the same project and tag the larger project (see example).
- Ensure that the project is set to Public on OSF.
-
The CONP supports both private and public OSF datasets, though we strongly recommend experiments be made public due to the non-sensitive nature of experimental files.
-
It is your responsibility to ensure your experimental stimuli are open-source.
The CONP will find your experiment automatically using the tag and add it to the portal within a few days.
- Upload to the CONP Community Server
If you are unable to use the OSF, you may be eligible for a space allocation on the CONP Community Server. Please use the CONP Portal Contact Form so we can evaluate your needs and help you upload your experiment.
How to download Experiments from the CONP Portal
Clicking on the "Experiments" button in the left-hand menu of this site will take you to a list of available experiments as well as a search function that includes all metadata associated with experiments. You can also constrain the search with drop-down menus to filter by modality (e.g., fMRI), function assessed (e.g., cognition), software (e.g., PsychoPy). You can download the experiment directly from the search page or open its source page (e.g., on the OSF).